Picture yourself staring at a cupped, twisted board of rough oak. Your palms itch to turn that rough lumber into glass. But a classic question quickly stalls your momentum in the shop. Which tool should you grab first from your rack? Choosing between handplanes and power planers changes your entire woodworking experience. Do you want the quiet satisfaction of paper-thin shavings floating down? Or do you need raw motor power chewing timber down fast? One tool delivers breathtaking optical clarity on hardwood surfaces. The other saves your lower back from brutal physical fatigue on site. Let us explore the differences between wood smoothing tools so your next build succeeds. Every woodworker needs clear answers to avoid damaging expensive lumber. Knowing when to use a hand plane vs power planer will transform your workflow. Let us break down their mechanics, real surface results, and practical workshop limits.
Tool Mechanics: How Handplanes and Power Planers Actually Work
You cannot pick the right tool without looking under the hood first. Both tools remove unwanted wood from high spots. Yet their mechanical kinematics belong to entirely different design worlds. One relies on pure human leverage across a reference bed. The other spins small knives at blinding rotational speeds. Achieving clean surfaces also depends on matching your tooling with timber characteristics, so take time to choose the right wood species for your joinery project before beginning your milling runs. Dense domestic hardwoods react very differently to cutting edges than soft, stringy construction pine. Understanding grain direction helps you set the right depth on every cut.
Anatomy and Physics of the Traditional Manual Handplane
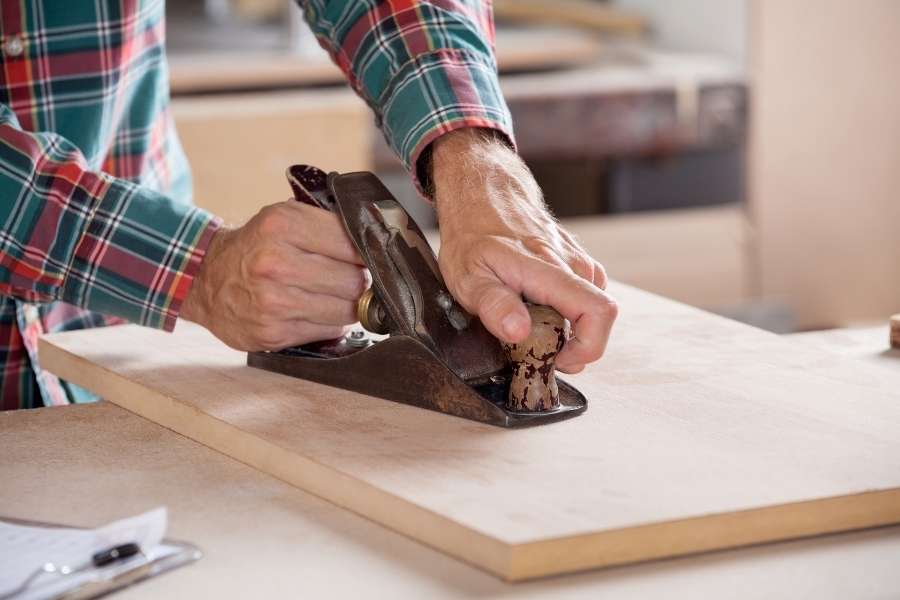
The bench plane uses geometry that dates back to Roman times. At its base sits the precision-ground sole of the tool. This metal bed registers flat against high timber areas. A sharp, hardened tool-steel blade locks firmly inside the central frog. This manual cutter extends through a narrow throat opening. As your hips drive the tool, the iron shears wood cleanly. Each forward pass produces a continuous, curled wooden shaving. The physical feedback through your fingers tells you everything about grain direction.
You can feel curly grain and changing density in real time. That tactile link lets you stop before creating deep tearout. Woodworking author Christopher Schwarz notes that handplanes function as measuring tools too. You read the wood surface as you slice across it. The bench plane gives you microscopic control over every single cut. You adjust the depth in thousandths of an inch. That level of micro-control protects rare, highly figured furniture hardwoods. You never take off more material than you intended.
Inside the High-Speed Handheld Electric Planer
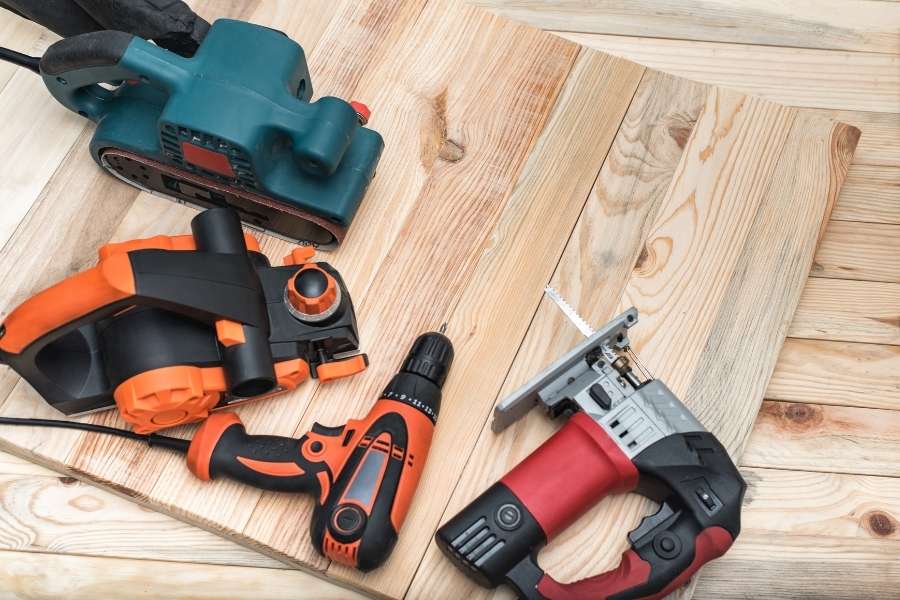
The handheld electric planer replaces muscle power with a spinning cutter drum. An electric motor spins two or three knives at high speed. Typical drum velocities reach up to 16,000 revolutions per minute. That rotary action chops away timber with tremendous forward momentum. The metal base features two distinctly separate bed sections. The rear shoe stays locked at the exact cutting circle height. The front shoe moves up and down using a depth knob. As you walk forward, the cutterhead scoops hundreds of tiny chips.
Electric units clear massive amounts of wood with zero physical strain. They level proud framing studs and ease binding exterior doors fast. But that spinning rotary motion leaves behind a faint scalloped washboard texture. You must hold the tool firmly to control sudden vibration. The tool requires consistent forward pace and firm downward hand balance. A lapse in concentration can drop the front shoe too early. That sudden tilt cuts an ugly gouge into your project edge. Precision work demands a practiced grip on the forward handle knob.
Surface Quality: Hand Smoothing Against High-Speed Milling
Wood grain always tells the truth once a finish hits it. The mechanical differences between these tools show up immediately under clear oil. One tool shears wood cleanly, while the other impacts it repeatedly. When building weather-resistant benches or outdoor tables, choosing reliable joinery projects for outdoor furniture requires durable timber surfaces that hold tight glue joints and resist seasonal rot. Outdoor assemblies need flat, true faces to prevent water from pooling inside exposed seams. Knowing how to mill edges cleanly ensures your finished patio builds last through harsh seasons.
Achieving Pristine Smoothing on Fine Furniture Woods
Fine furniture makers value flawless smoothing above raw material removal speed. A handplane lets you close the mouth opening down tight. You also set the chipbreaker very close to the cutting edge. That tight setup bends the shaving immediately upon separation. Bending the wood fiber stops tearout before it splits the grain. The result is a glass-smooth surface that requires zero sanding. Quartersawn oak and tiger maple retain their natural optical clarity. Wood cell walls stay open and cleanly sheared across the surface.
Researchers at the Forest Products Laboratory studied surfaced wood cellular structures. They found that planed wood cells absorb moisture more evenly than sanded ones. Sanding scratches timber and packs porous tubes with fine wood dust. A hand-planed surface simply glows under amber shellac or oil. Using the best hand planes for fine woodworking elevates your finished pieces. A standard Number 4 smoother handles delicate final passes with ease. You create museum-quality faces right off the freshly honed iron. Best of all, your shop air stays completely free of dust.
You also preserve crisp arris lines along delicate frame edges. Sanders round over sharp details and spoil tight joinery joints. The plane sole holds a true line right to the corner. That geometric precision makes fine furniture look crisp and intentional. Sharp handplane cuts leave edges square and ready for tight mortise joints. The process remains quiet and deeply rewarding at every step.
Fast Stock Removal Across Heavy Construction Timbers
Fine hand shavings make little sense on heavy construction jobs. Imagine dimensioning thirty rough fir joists for a backyard garden pergola. Flattening that much lumber by hand will exhaust your shoulders completely. Here, the electric motor wins the day through raw speed alone. The machine handles coarse wood stock without slowing down under load. It powers through tough knots that would quickly nick fine carbon steel irons.
Speed brings unavoidable trade-offs you must manage in the workshop. The spinning cutter drum leaves visible ripple waves across the timber. You cannot apply finish directly over those raw rotary cutter passes. You must clean the ridges with a sander or handplane. The tool can also grab loose knots and fling them outward. That aggressive impact risks deep tearout on changing grain patterns. Keep the electric planer reserved for coarse dimensioning and framing projects. Treat it as a rapid bulk-reduction machine, not a finisher.
You will save countless hours on initial timber preparation passes. The machine handles the heavy grunt work so you can rest. You save your physical energy for the rewarding joinery tasks later. That balanced shop approach speeds up large outdoor woodworking projects. Working smart keeps your momentum high on ambitious home renovations.
Accurate Board Prep: Flattening, Squaring, and Calibration
Rough lumber rarely comes out of the saw mill flat and true. Boards cup, bow, twist, and crook as internal moisture dries out. Building heirloom furniture requires turning warped boards into square reference stock. Preparing lumber methodically guarantees that all subsequent joinery fits without binding. Taking your time during primary milling saves hours of corrections during final glue-up.
How to Flatten a Board with a Hand Plane
Learning how to flatten a board with a hand plane teaches patience. You begin by inspecting the board with winding sticks and straightedges. Sighting across the sticks highlights nasty diagonal twists across the corners. Mark those high areas clearly with a soft carpenter pencil. Grab a scrub plane or jack plane with a curved iron. Work diagonally across the board face at a forty-five degree angle. Slicing across the grain hogs off high corners without heavy resistance. Check your progress often with a reliable steel straightedge.
Once the high peaks disappear, switch to a long jointer plane. A long cast-iron sole bridges across low valleys easily. It rides on high spots, shaving them down until level. Soon, the tool pulls full-length, unbroken curls from end to end. You now possess a true, dead-flat reference face for your project. This master face guides every subsequent measurement and joint you cut. It will not rock on your workbench or twist out later. That stable foundation ensures your case pieces stay square for generations.
Taking time to master this manual skill builds true workshop confidence. You become self-reliant and less dependent on stationary machine capacity. Any oversized tabletop slab can be tackled right on your bench. Hand skills turn difficult lumber challenges into simple working routines. You develop an eye for reading wood movement before you make a cut.
Edge Squaring and Working with the Stationary Thicknesser
Squaring a narrow board edge demands careful balance and steady hands. A jointer plane held square against the edge cuts true quickly. Your fingers act as an impromptu fence beneath the wooden body. The long sole ensures edge straightness across the entire board length. A handheld power planer struggles on narrow edge operations. The high motor weight makes the tool balance tippy and unstable. You can accidentally bevel an edge out of square very fast. Keep narrow edge work on a secure bench vise instead.
In professional production shops, woodworkers often feed stock into a stationary thicknesser. This machine mills the opposite board face parallel to the first. But you must flatten one reference face on your lumber first. Never feed a cupped board directly into a powered planer bed. The spring-loaded feed rollers simply crush the cup flat temporarily. The spinning cutterhead then shaves the compressed board evenly across. But as the board exits, internal tension springs the cup back. Therefore, the essential step of true flattening remains strictly necessary.
Achieving success with both tools requires deliberate machine calibration. For handplanes, align the cutting iron parallel with the sole mouth. For electric planers, align the rear bed with the knife swing. Misaligned tools create snipe, which ruins valuable board ends instantly. Take time to calibrate your tools before cutting expensive hardwood lumber. Inspect your cutterhead screws and check bed parallelism with calipers. Small adjustments prevent big headaches when gluing panels together later on. Precision setup separates frustrating mistakes from clean joinery results.
Daily Shop Realities: Setup Time, Safety, and Long-Term Costs
Tool comparisons must consider your actual daily workshop environment and habits. Beyond theoretical cut speeds, you must live with noise and mess. How a tool fits your space determines how often you use it. Choosing between corded power and manual hand tools shapes your weekly productivity. Consider your neighbors, workspace ventilation, and tool storage before investing.
Running loud electric machinery in a small garage creates immediate friction. Handheld power planers spray high volumes of chips everywhere. You need a dedicated dust collector or shop vacuum hooked up constantly. The high-pitched motor screams at ear-piercing decibel levels indoors. You must wear hearing earmuffs and protective eye goggles at all times. A power planer spinning at high speed demands complete mental focus. A caught electrical cord or sudden kickback can cause severe injury. Always let the cutter drum stop completely before setting it down.
Traditional bench planes offer a peaceful, meditative pace of shop work. You can work late at night without waking sleeping family members. Listen to podcasts or music freely without wearing bulky hearing protection. The waste drops straight to the floor as clean, manageable ribbons. However, hand tools require an upfront investment in sharpening gear. You need diamond plates, waterstones, and a dependable honing guide. A dull plane iron chatters across hardwood and tears out fibers. Sharpening is the entry fee you pay for clean, quiet cuts.
Once you master freehand sharpening, refreshing an edge takes two minutes. That sharp edge glides through tricky maple like hot butter. The pleasure of hearing wood slice quietly has no real equal. It keeps woodworkers hooked on traditional hand methods for a lifetime. Honing becomes a natural, calming rhythm during long building projects.
Frequently Asked Questions
Can a power planer replace a handplane for fine furniture making?
No, a handheld power planer cannot replace a handplane for fine furniture. Power planers are rough construction tools that leave visible cutter tracks across wood. They vibrate aggressively and cause tearout on figured or reversing grain patterns. Fine cabinetry requires the delicate control and whisper-thin shavings of bench planes. Use power planers for fast dimensioning and reserve handplanes for final surfaces.
Do I need to sand wood after using a handplane?
You rarely need to sand wood after using a sharp smoothing plane. A sharp iron cleanly shears wood cell walls, leaving a bright reflective surface. Sandpaper actually scratches wood surfaces and dulls the natural grain clarity beneath finishes. You only need sandpaper if you must blend different profiles together evenly. Otherwise, apply your chosen oil finish straight over the freshly planed wood.
How do I prevent tearout when using a handplane on difficult, figured grain?
Preventing tearout on figured timber requires three specific tool setup adjustments. First, hone your cutting iron to a razor-sharp, mirror-polished edge. Second, close the throat opening down to a very tight mouth gap. Third, set your chipbreaker within 1/64 of an inch from the edge. Taking whisper-thin shavings with this setup prevents grain from lifting during cuts.